


-Mar-04-2026-02-51-18-6918-PM.png?width=500&height=500&name=Regular%20Blog%20Hero%20(4)-Mar-04-2026-02-51-18-6918-PM.png)
Reddit Tests AI Shopping Carousels in Search Results: What We’re Watching
The landscape of conferences and customer engagement is looking pretty different in the COVID era. We’ve seen a rise in Zoom webinars as many companies have switched to online events to offer value and attract leads.
One great way to promote Zoom webinars is by using Facebook Ads.
If you’re spending money on promoting your webinar, it’s important to be able to accurately track how many registrations came from your advertising dollars.
We’ve seen strong success driving webinar registrations from Facebook, however implementing the ability to track registrations took some finagling. Here’s how to do it properly.

How Zoom Tells You to Track Registrations
Zoom has instructions for how to set up a Facebook Pixel to track Webinar registrations. If you’re like us, you may have followed this and noticed the pixel didn’t fire as expected.
The good news is we found a work around!
Setting Up a Facebook Pixel for Zoom Webinars
Follow these steps first to get your pixel information added to your Zoom webinar, then we’ll detail the steps for our work around.
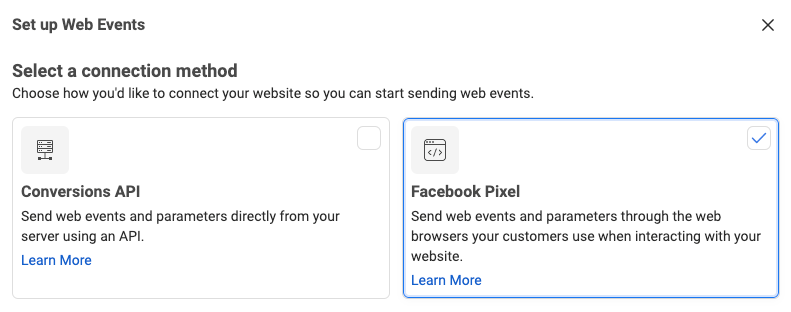
Create the Pixel and Extract the Necessary Information
Find your existing Facebook Pixel in Business Manager or create a new one
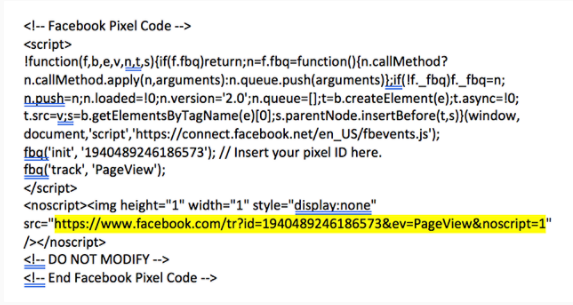
Under “Install Pixel Base Code” - copy the base pixel
You’ll only need the snippet highlighted below:
Add the Pixel URL to Your zoom webinar
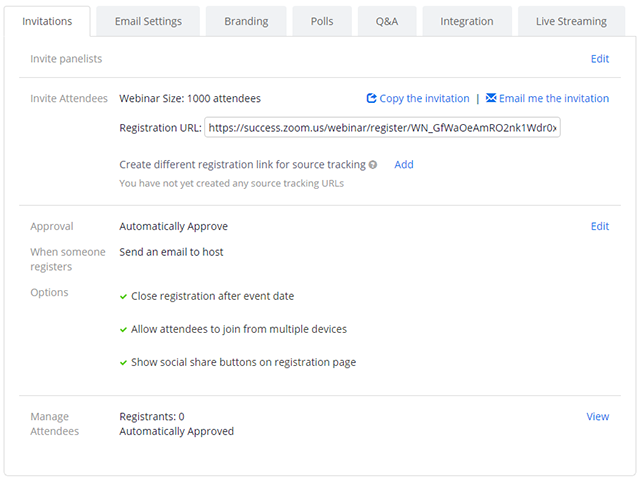
Sign in to your Zoom web portal
Click on “Webinars”
Click on the “Topic” to edit the webinar
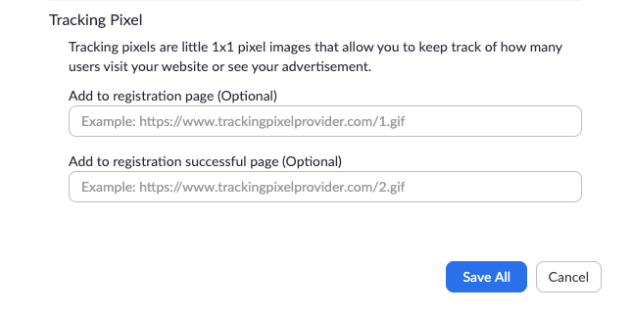
To track how many people reach the registration successful page, paste the same URL into the “Add to registration successful page” section and hit “Save All”
The Workaround to Track Zoom Webinar Registrations
When we implemented our pixel according to Zoom’s instructions, there was no unique event firing on the “Registration Success” page. Facebook also wasn’t picking up any distinguishing characteristics in the URL that we could fire on.
We also tried adding an additional event parameter (example below) with our custom conversion name to the Pixel URL, but it still wouldn’t fire.
https://www.facebook.com/tr?id=123456789&ev=CompleteRegistration&ev=PageView&noscript=1
The solution that finally worked for us, was to create a brand new 2nd pixel and enter it in the “Registration Successful Page” section outlined in step 6 above.
Here are the steps to use this work around to track Zoom webinar registrations on Facebook.
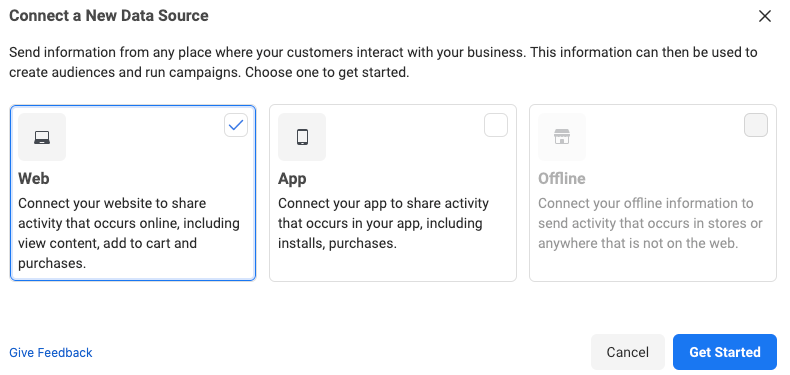
Create the 2nd Pixel and Extract the Necessary Information
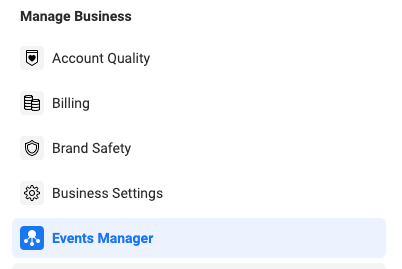
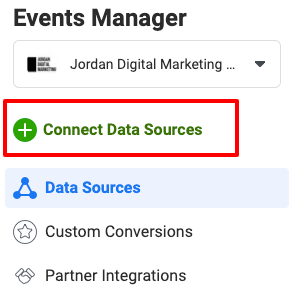
In Facebook Ads Manager, click on the Business Tools menu on the left and select “ Events Manager”Now that the 2nd pixel is created, go and grab the highlighted snippet that looks like this:
Add the Pixel URL to Your Zoom Webinar
Enter this snippet in the “Add to registration successful page” only
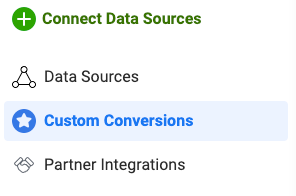
Create a Custom Conversion
Now we’ll create a conversion that tracks the page views from your new Webinar Pixel as a conversion.
In Events Manager go to “Custom conversions”, and select “Create Custom Conversion”Make sure the data source for the conversion is the Pixel you just created and name the custom conversion. We named ours “Webinar Registration | Pixel 2”
Add the rule URL contains “zoom” and save the conversion
Since this pixel is only placed on the registration successful page, it will only fire when someone signs up.
Setting Up the Facebook Campaign
If you’re running a conversion campaign, you will need to include the conversion to optimize for at the ad account level.
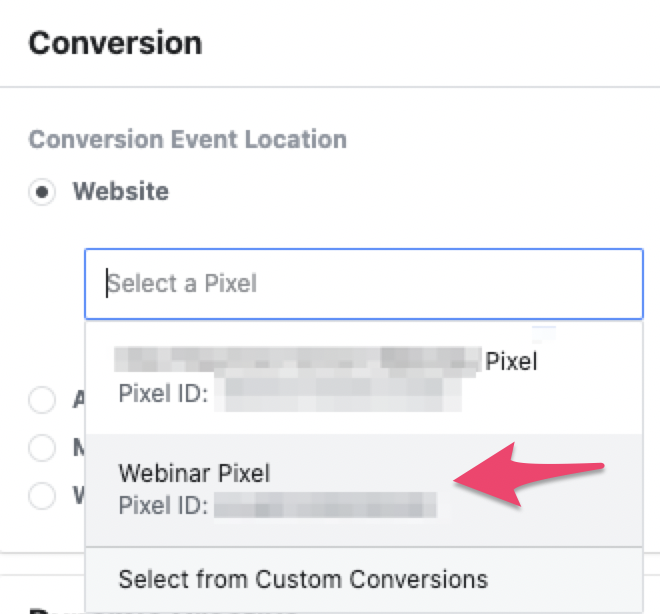
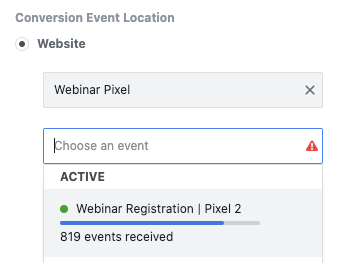
Since you have more than one pixel associated with the ad account, it will first ask you to select which pixel to useUnder Choose an event, select the new custom conversion that you created from the dropdown
Limitations of Using Two Facebook Pixels
Only one pixel can be associated with a campaign. This means that in the reporting you’ll be able to see the results from this custom conversion, but you won’t be able to add in any additional custom columns to show events happening on your original pixel.
For example, if you wanted to create a custom conversion to keep track of how many people visited the webinar sign up page, you wouldn’t be able to see that in the Facebook reporting.
For us, this limitation was worth it because it was most important to be able to which ads generated registrations and to optimize our campaigns around that goal.
If you need any help promoting your webinars, contact us for more information!


Laura has over a decade of experience in paid media strategy and execution in both agency and in-house accounts and uses advanced analytics skills to scale growth within efficiency goals across Google, LinkedIn, Facebook, and more. Laura, a frequent contributor to Search Engine Land and a regular panelist on the SMX series of events, manages a large team of paid media experts remotely from her home in Salt Lake City.
-Mar-04-2026-02-41-57-8014-PM.png?width=500&height=500&name=Regular%20Blog%20Hero%20(3)-Mar-04-2026-02-41-57-8014-PM.png)
-Mar-02-2026-02-23-27-4484-PM.png?width=500&height=500&name=Regular%20Blog%20Hero%20(2)-Mar-02-2026-02-23-27-4484-PM.png)
.png?width=500&height=500&name=Impressions%20Blog%20Hero%20(1).png)