Snapchat is a great platform to drive low cost installs for your app. With a seamless swipe up, users can directly access the app store page within Snapchat.
If you haven’t set up Snapchat Ads Manager yet, be sure to check out our post about it.
In this blog, we’ll provide a step-by-step guide to setting up a Snapchat Ads campaign.
How to Set Up a Snapchat App Install Campaign
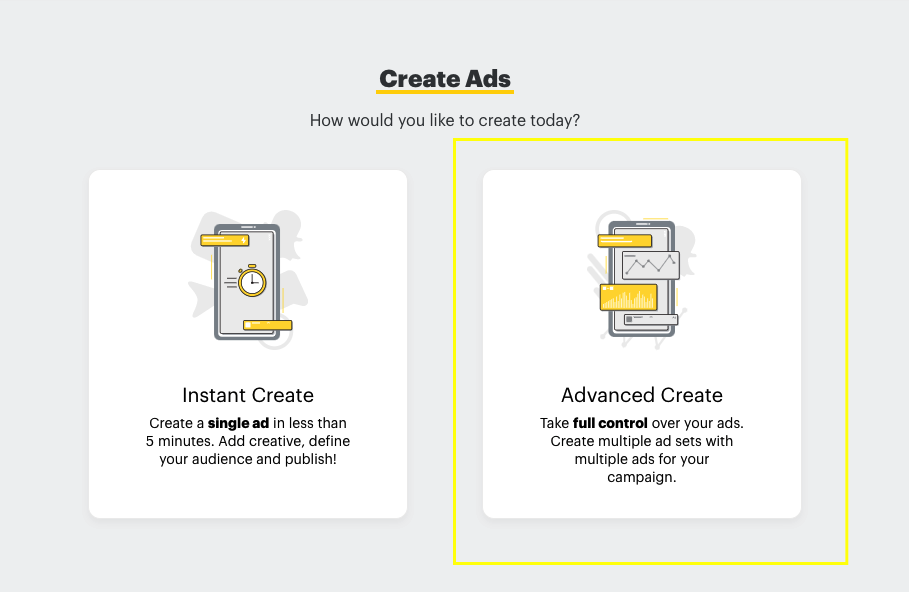
When setting up your a Snapchat Ads campaign, you will go to the navigation bar and select “Create Ads.”

That will bring you to this screen, where you’re able to choose between Instant or Advanced create. The advanced option gives you more control over your ads, so for the purpose of a full walkthrough, choose Advanced.
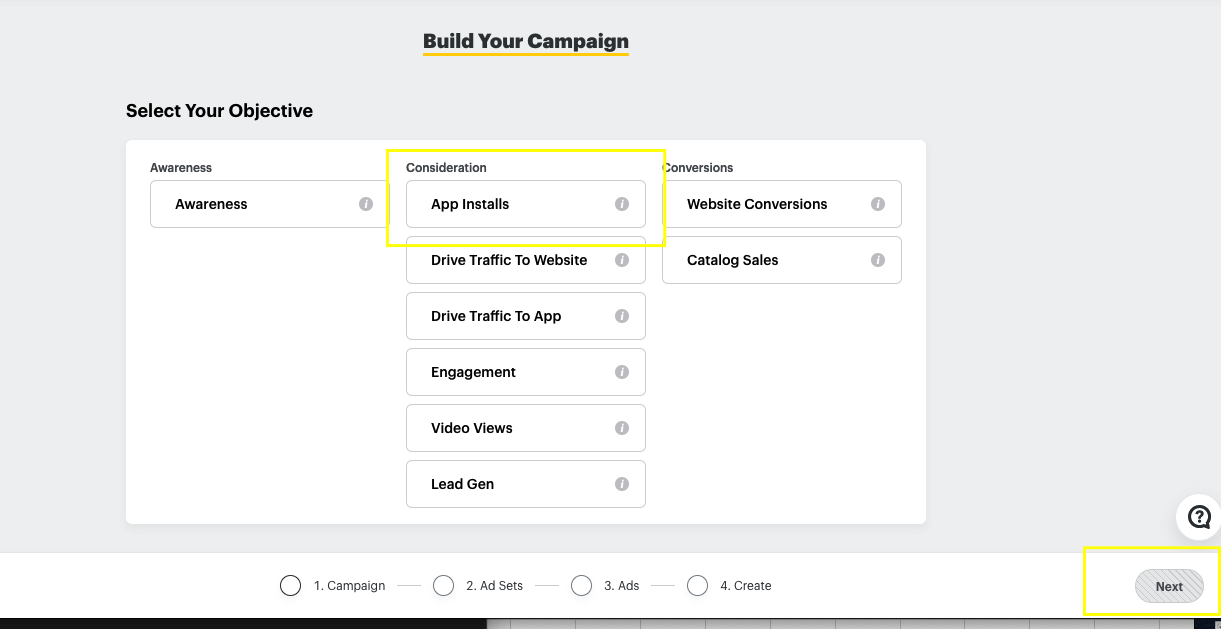
Now we are brought to a screen where we will select our campaign objective. In this case, we are focusing on app installs.
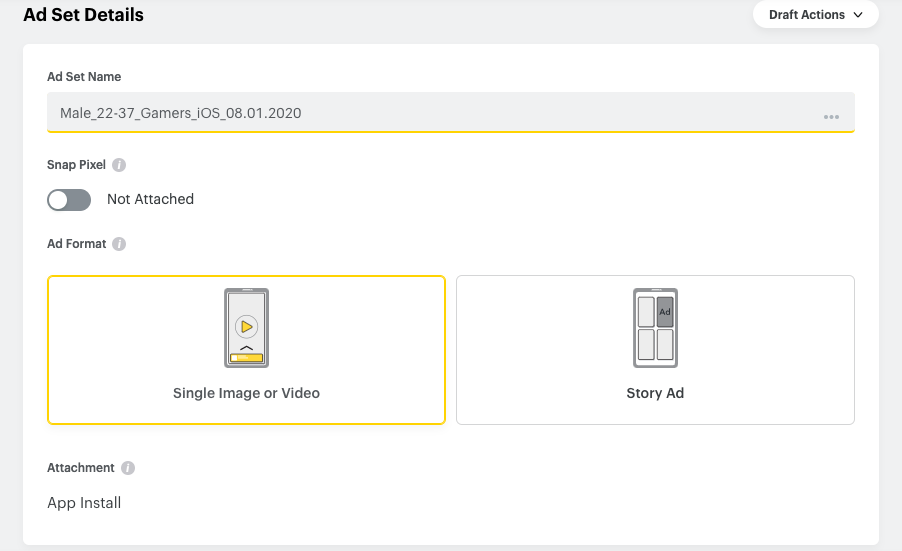
Next, you’ll name your ad set, select whether you are attaching a snap pixel to your ad, and select your ad format. The Snap Pixel helps you measure the cross-device impact of your campaigns, allowing you to analyze the actions Snapchatters take on your website after seeing your ad. By enabling this toggle, your pixel will be applied to all ads beneath this ad set.
It is always a good idea to label your ad set with information that will allow you to see performance at a higher level; this includes demographic targeting info, operating system info, and when it was launched. This way, you can easily see what pockets of the audiences you are targeting are performing well or poorly at a glance.
At JDM, we like to use this naming convention:
Male_22-37_Gamers_iOS_08.01.2020
It is always a good idea to test multiple ad formats. For this example we will be choosing single image, but make sure you are always testing video or story ads as well.
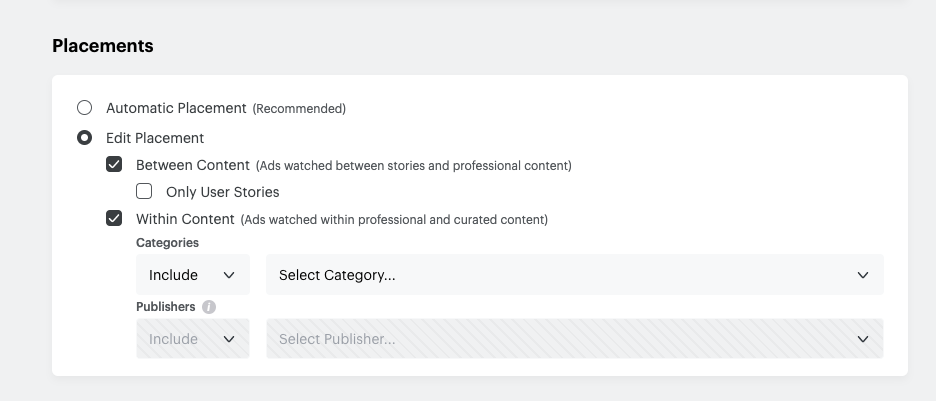
Next, you will choose which placements to show/not show your ad on. Your ad can show between content or within content. You can choose automatic which will allow the Snapchat algorithm to drive to whatever is delivering the best results, or control this yourself with “Edit Placements”. Depending on which vertical your business may belong in, you may not want to show in certain categories so you will want to exclude these.
Next, you will enter location information -- this will tell Snapchat where your target audience is located.

Now, choose your demographic information -- this is where you choose the following demographics for targeting:
- Age
- Gender
- Language
- Any advanced demographics such as income, life event, etc.
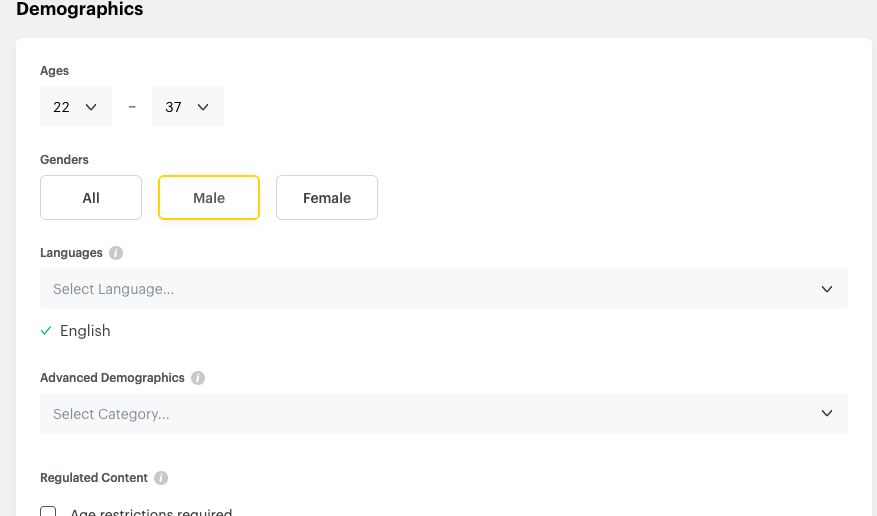
In the audiences section, you can get more targeted with interest based targeting. In the below example, we are targeting gamers. There are subcategories within this that allowed us to get more granular.

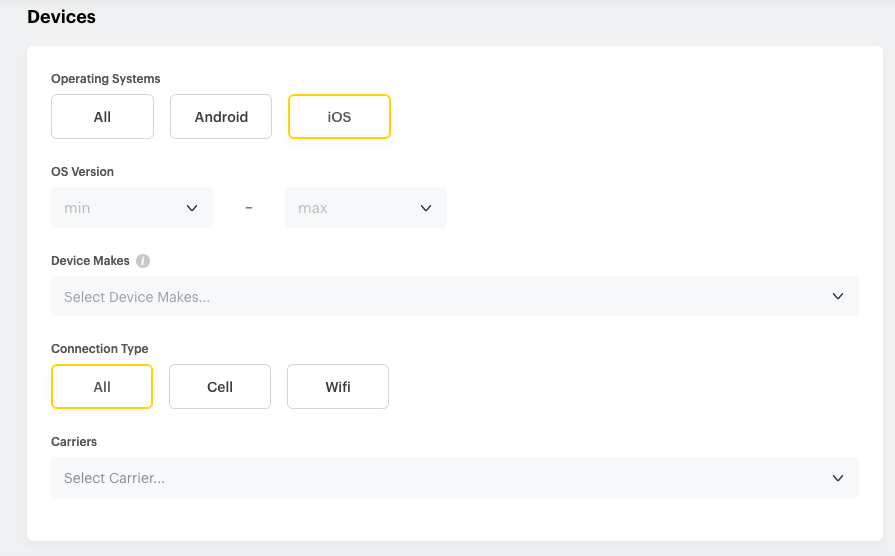
Next, we can choose which operating system we’d like to target. We at JDM we always segment our campaigns at an operating system level. This way we can see where we are seeing better performance at a higher level so we can easily make optimizations. It is typical to see iOS users behave differently in comparison to Android users, so we never want to lump these all together.
You are also able to choose from OS versions, carrier, and connection type. We typically leave these as to include all and simply segment at the operating system.
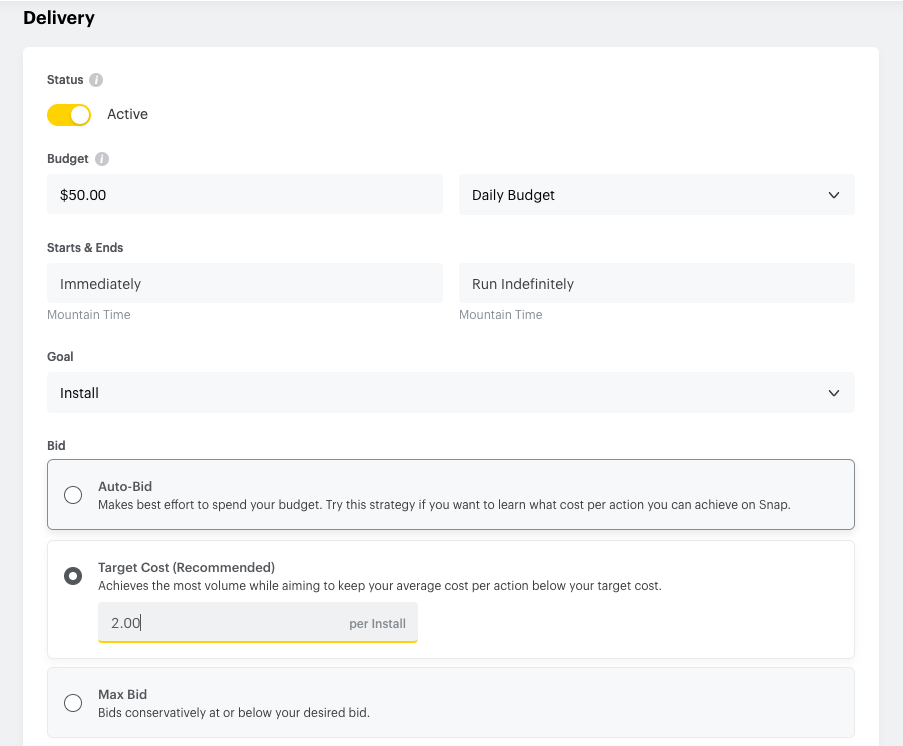
Now it’s time for our delivery settings. We’ll set a daily budget, start & end date (if any), and how we’d like to set our bids. We can us auto bidding, maximum bidding, or target cost:
- Auto-Bidding: Makes best effort to spend your budget. Try this strategy if you want to learn what cost-per-action you can achieve on Snapchat ads
- Target Cost: Achieves the most volume while aiming to keep your average cost-per-action below your target cost
- Max Bid: Bids conservatively at or below your desired bid. This allows you the best bid control with the least algorithmic improvements to your stated goal.
We typically start off with a low target cost and adjust as we see early performance come in.
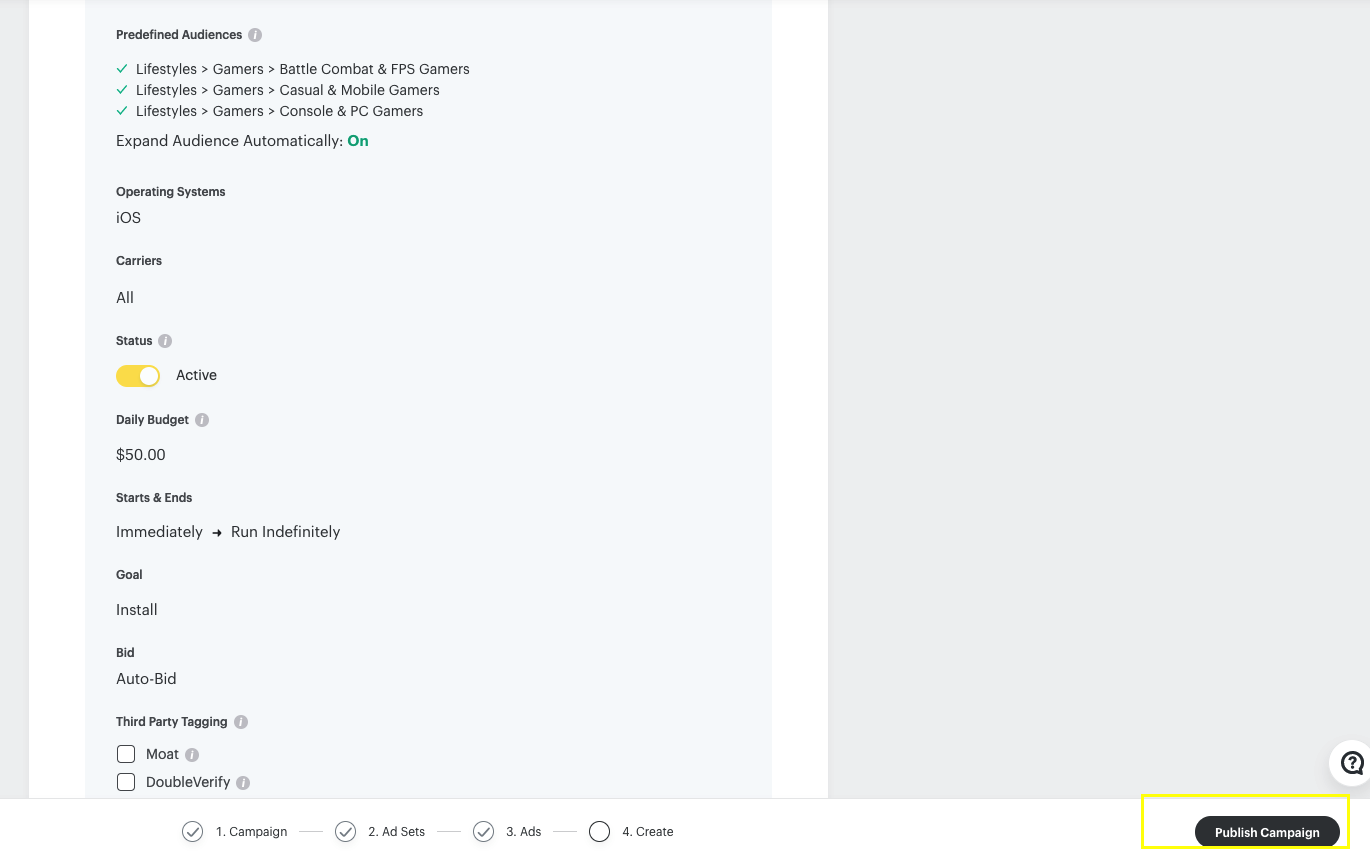
If you are not using a third party tagging tool (Moat/DoubleVerify are supported by snap), then you will check this box and then click next. Otherwise, leave it blank and move on to the ads set up page.

Now, it’s time to create an ad! Start by naming your ad. This naming convention is totally up to you, but we like to use some sort of differentiator in order to see how assets are performing at a high level across campaigns when we perform analyses.
Here you will also enter a headline, your brand, attach the creative, and choose a call to action. For App Installs, you typically always want to urge the user to swipe up and Install Now.

You will also include your app name, iOS App ID, and Android App URL. After entering this information and adding in any impression tags or swipe up tags (these aren’t really necessary), hit next to review your ads and publish to create your first campaign!
There are a multitude of platforms where you can advertise your app, and it is always good to test new platforms. If you have any questions about getting started on Snapchat ads, contact us today!